Start Your Own Herb Garden in Old Jars – The Perfect DIY Project for Beginners
Are you looking for a simple, budget-friendly way to get into gardening? Creating your very own herb garden in old jars is a fun and easy project that’s perfect for beginners. Not only will you have fresh herbs at your fingertips, but you’ll also add a charming and practical décor element to your kitchen! Plus, it’s a great way to recycle old jars, turning them into something functional and beautiful. Here’s how you can get started:

Why Start a Herb Garden in Jars?
Starting a herb garden in jars is an ideal way to dip your toes into gardening. It requires minimal space, and you can grow herbs even in the smallest of kitchens. It’s also incredibly rewarding to watch your herbs grow and thrive, knowing that you’re growing your own food. Plus, you get the added bonus of fresh herbs to elevate your cooking!
Old jars are a fantastic material to use because they’re free, often easy to find, and come in a variety of shapes and sizes. With just a few simple materials and a little patience, you can have your own mini herb garden right on your windowsill.
What You’ll Need:
- Old jars: Mason jars, jam jars, or any glass jars you have lying around. Make sure they are clean and dry.
- Small rocks or pebbles: These will help with drainage.
- Potting mix: Choose a good quality potting soil suitable for herbs.
- Herb seeds: Pick herbs you love or use often in your cooking, such as basil, parsley, thyme, or mint.
- Water: To keep your herbs hydrated.
- Optional: Decorative labels or twine to personalize your jars.
Step-by-Step Guide to Creating Your Herb Garden in Jars
1. Prepare the Jars
Start by cleaning your old jars thoroughly. Once they’re clean and dry, it’s time to add drainage. Since jars typically don’t have drainage holes, we’ll create our own with small rocks or pebbles. Add a layer of rocks (about 1-2 inches) at the bottom of each jar. This layer will allow excess water to drain away from the roots, preventing them from getting soggy and ensuring the plants thrive.
2. Fill with Potting Mix
After adding the rocks, fill each jar with potting mix, leaving a little room at the top. Gently pack the soil, but don’t compress it too tightly. Herbs need loose, well-draining soil to grow well. If you’re using multiple jars, you can mix different types of herbs in each jar or create a small herb “garden” by grouping similar herbs together.

3. Plant the Seeds
Plant your herb seeds according to the instructions on the seed packet. Typically, you'll need to sprinkle the seeds evenly over the surface of the soil and then gently cover them with a thin layer of soil. Be sure not to overcrowd the seeds, as this can lead to weak growth.
4. Water Lightly
After planting your seeds, give them a gentle water. Herbs prefer slightly moist soil, so make sure not to overwater. It’s better to water small amounts more frequently than to flood the jar. Use a small watering can or a spray bottle for easy control.

5. Place in a Sunny Spot
Herbs need plenty of light to grow, so place your jars in a sunny spot, such as a windowsill that receives at least 4-6 hours of sunlight per day. A south-facing window is ideal. If your light levels aren’t great, you can consider using a grow light to help your herbs thrive.
6. Maintain Your Herb Garden
Keep an eye on your herbs as they grow. Make sure the soil stays moist but not soaked, and be sure to check the growth regularly. Once your herbs start sprouting, you can thin them out if necessary, allowing the stronger plants to thrive. If they get too leggy, you can trim them back to encourage bushier growth.

7. Harvesting
Once your herbs are big enough to harvest, you can begin using them in your cooking! Snip leaves as needed, but be sure to leave enough behind so the plant can continue growing. Regularly trimming your herbs will also help them stay healthy and productive.
Decorating Your Kitchen with Your Herb Jars
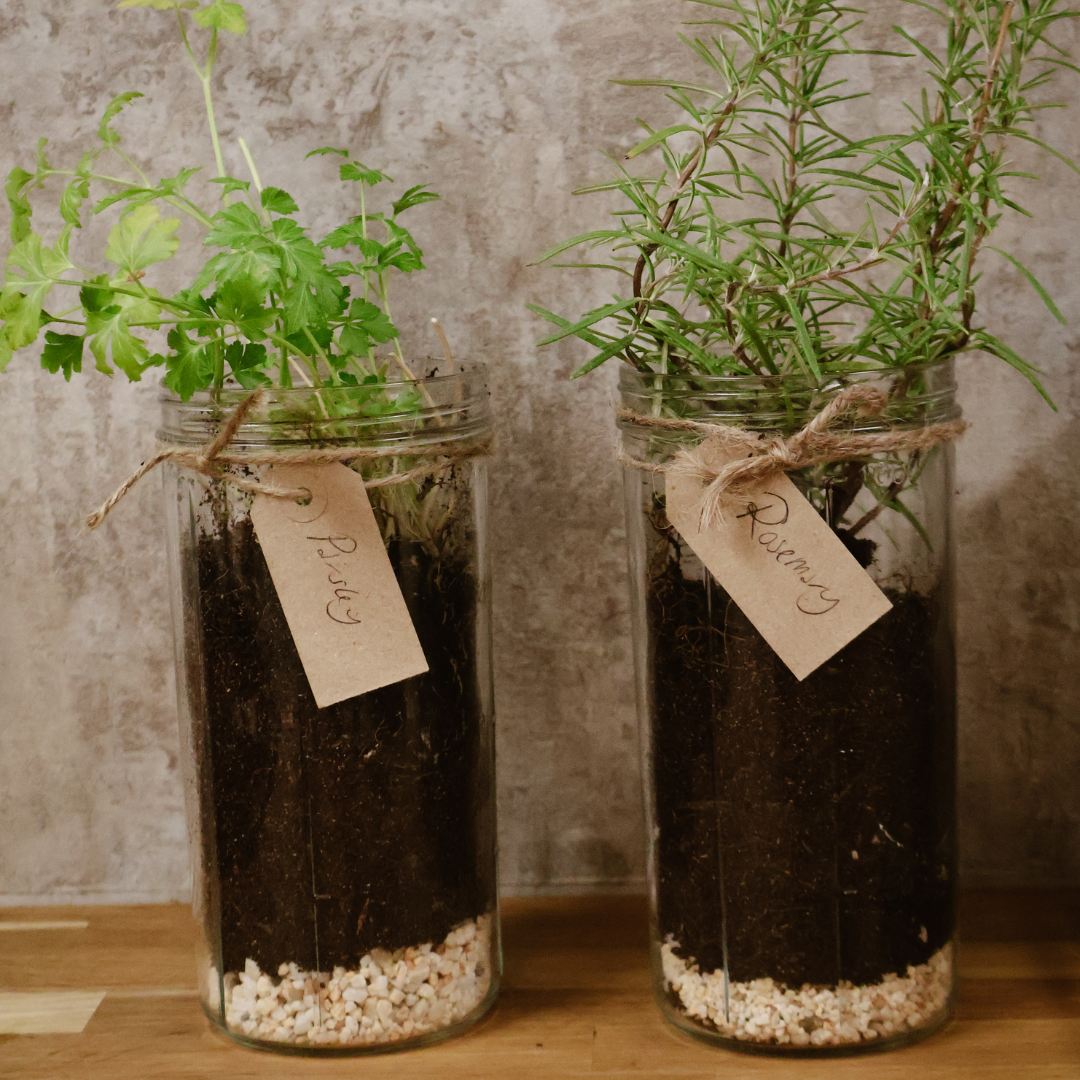
Not only will your herb jars provide fresh flavours for your meals, but they’ll also make a lovely addition to your kitchen décor. You can arrange your jars in a row on the windowsill or create a mini herb garden on your kitchen counter. If you want to add a personal touch, use twine to tie labels around the jars or paint the jars for a fun and creative flair. Each jar can be labelled with the name of the herb, making it easy to identify which one is which. You can even add small decorative touches like burlap or ribbon to match your kitchen's aesthetic.

Tips for Success
- Choose the right herbs: Some herbs do better in small containers than others. Basil, mint, chives, parsley, and thyme are all excellent choices for jar gardens.
- Don’t overcrowd: Make sure each jar has enough space for the plants to grow. If you’re using smaller jars, it’s best to plant just one type of herb per jar.
- Use a saucer: To protect your surfaces from water damage, consider placing a small saucer or tray under the jars.
- Rotate regularly: If you’re placing your jars on a windowsill, remember to rotate them occasionally to ensure even growth on all sides.
Final Thoughts
Starting a herb garden in old jars is a fantastic way to get into gardening, even if you’re short on space or gardening experience. Not only will you have fresh herbs for your cooking, but your jars will double as charming kitchen decor. Plus, it's a fun and creative project that helps reduce waste by reusing old jars! So, gather your supplies, plant your seeds, and watch your herb garden grow right in the heart of your kitchen. Happy gardening!